Every room has the essential furniture which serve their purpose in the room. The “styling” is what happens next. It’s what tells the story and breathes life to a room. Let’s walk through these steps to help you uncover your style.
Step 1: Are you a Minimalist or Maximalist
A zen minimalism approach is simple, clutter is minimized, and the focus is on things that are necessary. There’s a 90/90 rule for minimalism that encourages you to keep only items you’ve used or will use within 90 days. Colors are neutral. Objects can hold meaning, but there are not as many of them.
In maximalist style, more is more. The look is layered, bold, patterned, extravagant. The objects and art are plentiful.
Start with a high level approach to which side of the spectrum you lean. Are you looking to declutter or to add layers of flair?
Step 2: The Home Edit
Take everything out. You have to start with a blank canvas. A good purge is so good for the soul. As you remove things, do you want to (1) keep, (2) donate, or (3) trash? As you bring things back into the room, you will be reassured in their value to you.
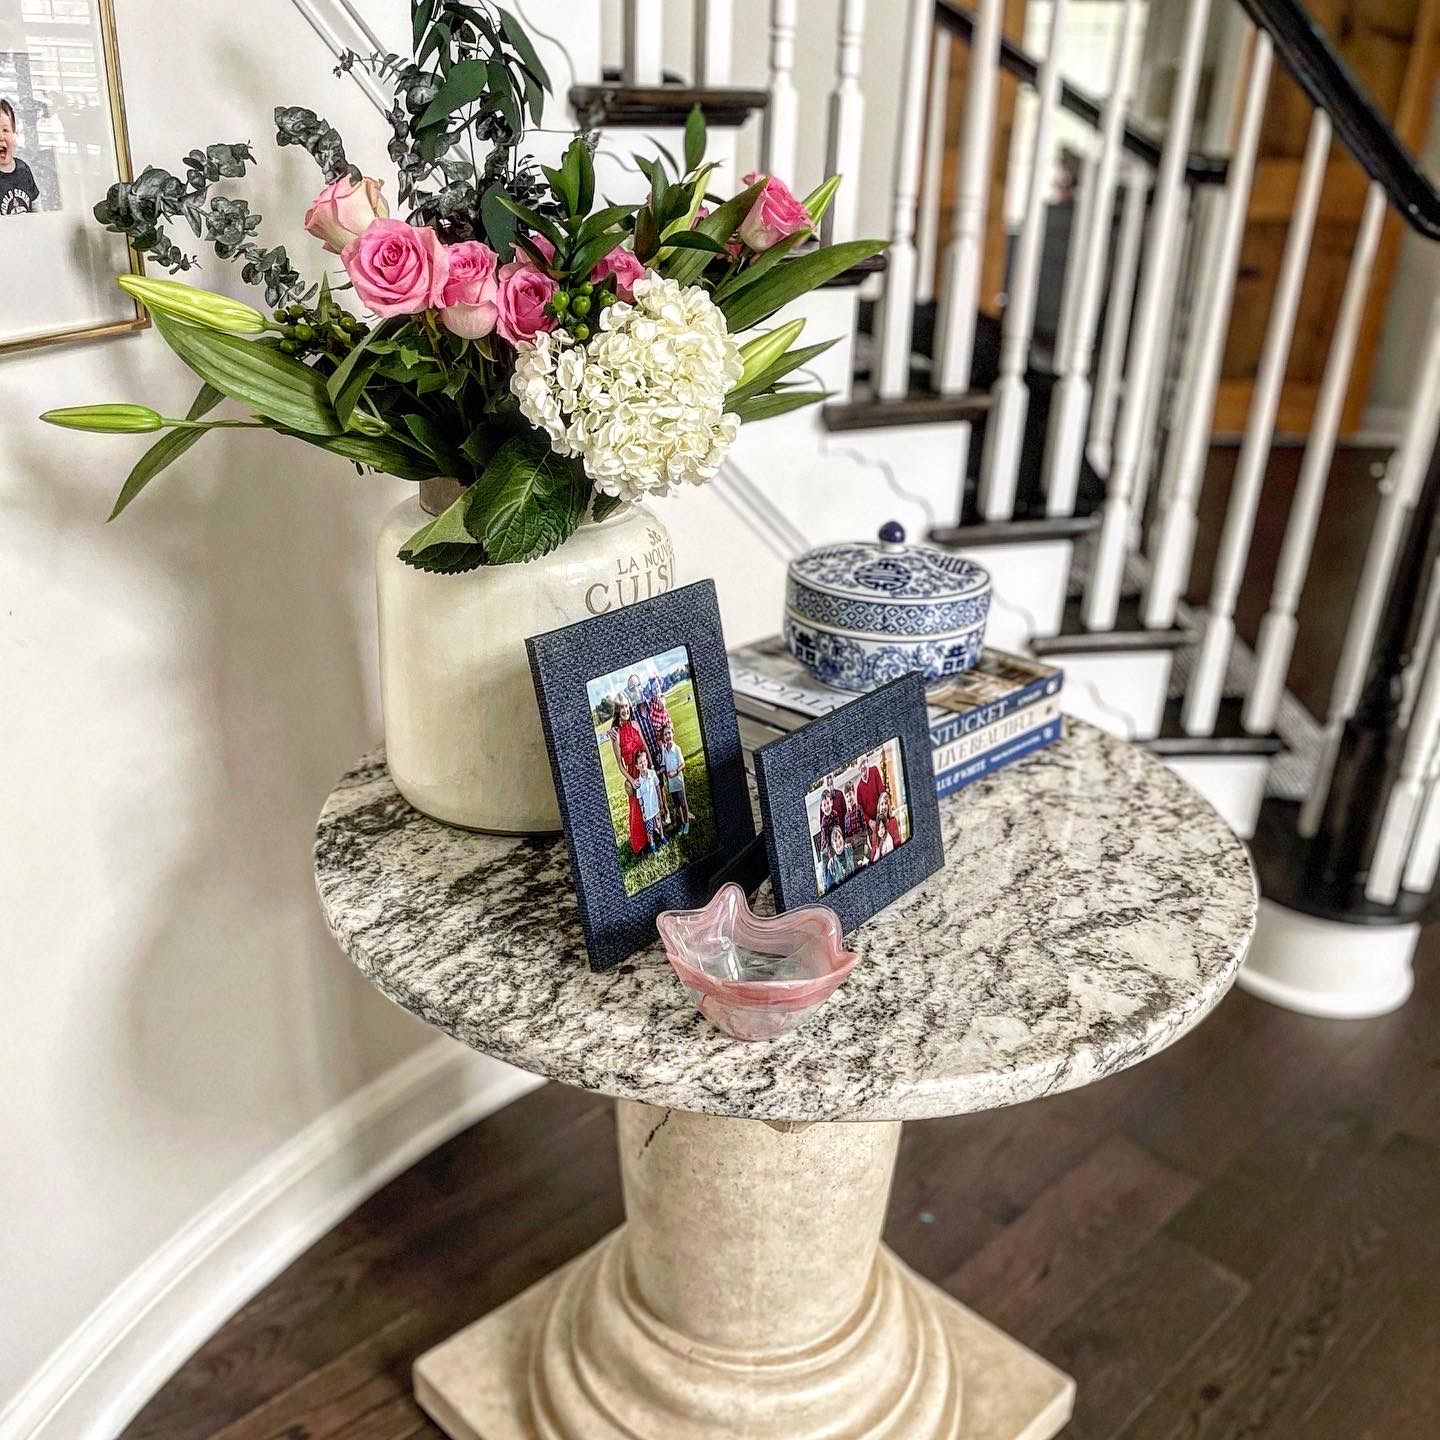
Step 3: Focal Point
Now that you have a blank slate, what should the focal point of the room be? A focal point is defined as the center of interest or activity. In design it essentially means where do you want to draw the attention?
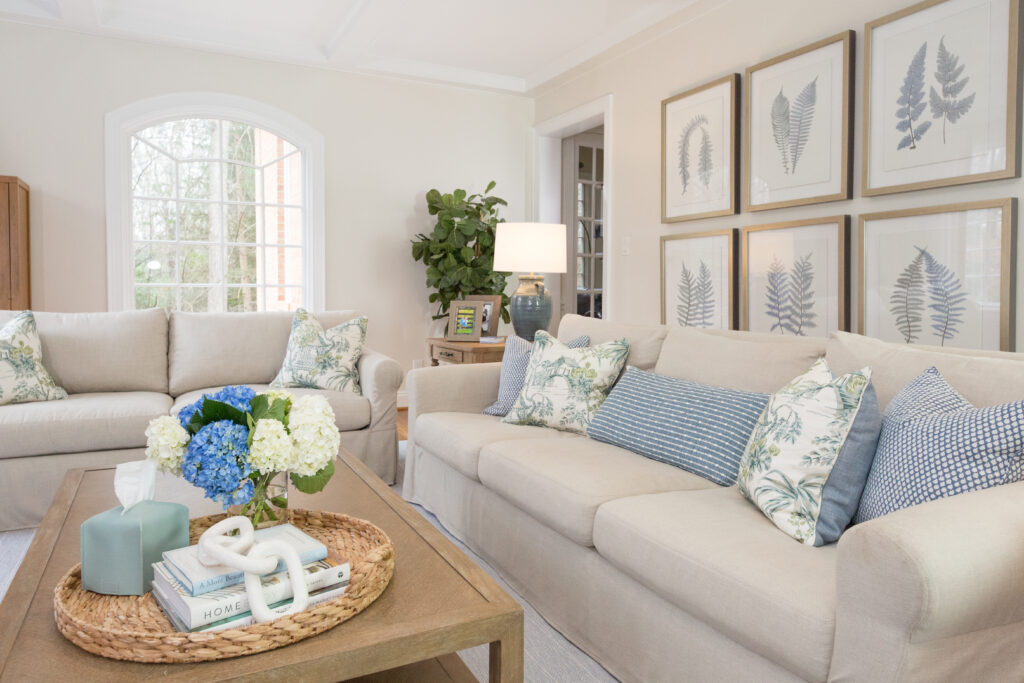
Most living rooms the focal point is a fireplace, or a stunning view from the windows. Dining rooms are more centered with the focal point being the table. In a bedroom, the bed is the focal point.
How can we enhance the focal point of the room? This is where you want to put the main piece of artwork flanked by the gorgeous sconces, hang a stunning chandelier above a dining table, or showcase the vases from your travels or family photos on a mantle.
A more micro approach to focal point is when styling shelves and/or tabletops. My advice here is to ensure there’s balance throughout. If you have something like candlesticks that are taller, balance it out with something tall on the other side. If you have something wider like a wide vase on one side, balance it out with something of equal visual weight on the other side.
Step 4: Scale
One of the design cornerstones of Lauren Berkey Interiors is to enhance the architecture and “bones” of an existing room. This goes for styling as well. You want to enhance the bones of the room, and have to remain true to the confines in place. The scale and proportion of the items in the room and/or decorating the room have to be aligned with the room itself.
If you have a tall ceiling, draw the eye up with properly placed window treatments and chandeliers. If you have a small room, do not buy an oversized coffee table, and be cautious about overly large-scaled prints for fabrics or wallpaper. Lamps should be proportionate to the table they sit on.
Step 5: Sprinkles
If you think of styling a room in terms of layers of an ice cream sundae…
Bowl: walls, windows, doorways
Ice cream: fabrics, window treatments
Sprinkles: artwork, decorative objects, books
The sprinkles are what add that flair, tell your story, and make it yours. This is where I tell you, “Rome wasn’t built in a day”. These “sprinkles” are meant to showcase your life and what is important to you. They are gathered over time whether they be momentos from your travels, items passed down from prior generations, gifts from significant life events. They will pique your guests’ interest and start conversations, or simply spark memories as you pass them by each day. Do not run out to Home Goods and buy every tchotchke possible to fill your newly built custom shelves. Or if you must because you’re just getting started, I understand, but pinky swear you plan to replace items over time.
A few rules for your “sprinkles”
Odd Numbers: groupings in odd numbers generally look best. A cluster of 5 vases on a console table, an arrangement of two frames and a vase (3 objects), one large centerpiece.
Height: vary the height of the objects to create dimension, with generally the center being the highest point. If there’s a slanted wall, orient the taller objects to fill the space that reaches higher, but balance it with something “heavy” on the shorter side – “heavy” meaning thicker or more bold, something that visually carries more weight.
Selecting art or frames: follow the shape of the wall. If the wall is shorter horizontally and longer vertically use a portrait orientation. If the wall is shorter vertically and longer horizontally use a landscape orientation. Similarly if you do a gallery wall, just ensure the overall shape of the arrangement follows the shape of the wall.
Declutter: Coco Chanel famously said, “Before you leave the house, look in the mirror and take at least one thing off”.
Triangles: There are a lot of triangles in styling, for example:
Styling shelves. You may have a pop of color throughout otherwise neutral objects. You want to place the pop of color objects in a way that draws the eye in a triangular shape from item to item on shelves.
Styling a coffee table or foyer table. When viewed from the side you would see a right angle with the taller piece at the back tapering down to lower height items in front.
Stacks. You don’t want any absolutes. A stack of books should have a frame or object on top to make a general triangular shape. A stack of boxes would be stacked from largest to smallest.
Organic shapes: continuing the concept of shapes, there are so many right angles in rooms. Walls, shelving, doorways, window frames – rectangles everywhere! You should break up the grid like aesthetic by adding curved and organic lines with bowls, round trays, vases, plants.
Step 6: Lighting
Electricians and contractors love putting in canned recessed lighting. Get them on dimmers! Full wattage overhead lighting is just offensive. A room’s personality is so much more inviting when the lighting is from lamps or indirect lighting

+ show Comments
- Hide Comments
add a comment